Showing posts with label cooking. Show all posts

Tuesday, January 15, 2008

Chicken liver pate

We spent the weekend at home because of the impending rain on Saturday and the temperature drop on Sunday. That ended me up experimenting on two dishes, chicken liver pate and cucumber sushi. I did have plans to cook but these two are not on my list. I was supposed to try gambas ajillo or putanesca but obviously none of them was served in my kitchen. Coming up with the two dishes were both unplanned. On Saturday, I went to the market with Ate Rosie (my first Saturday at the market in my 3 years stay in Taipei) to buy a week’s supply of meat, fish and vegetables. Thinking of something new to grace my daughter’s palate, I thought chicken liver would be nice and healthy as well. I bought an “i-jin” (600gms) of it and planned to have it divided for several cookings. I realized though that the hubby does not eat liver but on the contrary, he loves liver spread and he eats igado (Filipino dish with pork liver). So, few pieces went into the pot, mixed with seasonings and resulted to liver adobo good for three servings but not necessarily in a single day. The uncooked ones were meant to be stored in the freezer. After lunch, I thought of searching the internet for any other liver recipes and found the chicken liver pate (with video shown in videojug) interesting. I told the hubby about it and with delight, he agreed that I try it. We checked the ingredients and it turned out that we’d need bacon rashers and sherry besides the seasonings we already have in the kitchen cabinet. No sherry was found in the grocery and the net showed that to come up with it, two different kinds of beverages need to be mixed. That being said, we opted to use red wine instead. And you know what, the liver turned out to be the cheapest ingredient of the liver pate. This made me realize why pates are costly back home; I’d rather buy the canned liver spread next time, lol. Anyway, the cooking process turned out to be not as simple as I thought; putting the cooked dish in our tiny blender resulted to some mess. The good thing is that we ended up with three servings of homemade chicken liver pate. Please see the complete “cooking story” that follows and give it a try if you’re interested. Of course I’d say you will love it!


The homemade chicken liver pate


Ingredients that I used (sorry, no exact measurements provided):
Chicken liver, cleaned and halved


Rashers bacon
Basil leaves (it should have been parsley but I didn’t have it)

Red wine (it should have been sherry)
Italian spices (I thought it would be nice to add these up)
Chopped garlic
Chopped onions
Butter, two portions (one for cooking and one for topping later)

Bay leaves (for toppings later)
Salt and pepper

My way of cooking it:
1. I melted the butter to have the portion for topping available right away. I used what’s left in the pan to fry the bacon with the onions and garlic added later.

2. I added the liver tossing it ocassionally. I gave it at 5~7minutes before putting the seasonings.

3. I added the Italian spices, sprinkled a dash of salt and pepper and stirred. I gave it 2~3minutes so the seasonings can “get through” the liver and bacon.
4. I added the red wine and left it to simmer for 10minutes. Occassional stirring still needed here. Of course, I tasted (and asked hubby to sample it as well) the sauce to make sure the seasonings are enough.
5. I added the basil leaves and give it another 2 minutes.

That’s it, it’s cooked! The next step is to blend dish. I’d say this is the part that takes most of my time preparing the pate. The dish had little sauce so I had to add a little amount of water otherwise the blender will not work. I know this is not supposed to be done, don’t do it then. Find other means, maybe you can add sherry or melted butter instead.


Finally, after having it blended, I set three small containers (this is advisable so you can open and consume one in a day or two), spread the blended dish and had it follow the mould of the containers. I put few bay leaves on top (for decoration purposes huh?) and topped it with the melted butter. That completed the chicken liver pate. The containers had to be placed in the fridge until the butter solidified.


The story ends with the family enjoying toasted loaves of bread topped with homemade chicken liver pate. Sunday’s experimental dish will follow in a separate post.

Credits: http://www.videojug.com/film/how-to-make-chicken-liver-pate - this was my main recipe reference. I altered it to suit availability of ingredients.
Note: Photos in this post are all taken by the blog author.

READ MORE...

Friday, January 11, 2008

Strange-sounding, mouth-wathering recipe: ADOBASIT

Combination of pork and squid invading one of my teflon pots

You’re not a Pinoy if you don’t know and eat adobo! That’s my personal line and I don’t intend to insist. :) Adobo has always been a favorite in our home. The adobo can be anything like baboy (pork), manok (chicken), combination of baboy and manok (the first three can be with or without potatoes), pusit (squid), and sitaw (string beans). The adobong manok can also be varied from a combination of all body parts (except the internals), wings, drumsticks, breasts, and “adidas” (chicken feet). Back home, different provinces have their own ways of coming out with adobos, others prefer dry while others with sauce to mix with the rice later. For me, if I cook adobo, I always include all, if not most, of the following basic ingredients: onions, garlic, ground or whole pepper, bay leaves, soy sauce, vinegar (or calamansi extract), salt and sugar. At times, I add ginger to adobong manok and oyster sauce to adobong pusit. In one of my favorite restaurants (part of Iggy’s Inn or Iggy’s Place) in Baguio, the special adobo served is a combination of lechon baboy and chicken. That didn’t sound strange at all to me.

Recently, I was exchanging comments with my multiply friends when I posted our Christmas celebration with seafoods mainly served. Noeds, also a high school friend back in SJHS, asked Sharon and I if we ever tried cooking adobong baboy and pusit, not separately but combined. Both our answers are “no” followed by same reaction and question of “Really, is there such thing, sounds strange to us! Can you share your recipe?” Noeds in turn told us she just cooks it like the regular adobong baboy and add the pusit. The tastes match, she said. She also mentioned about using something like the pork cubes. I told her I’d like to try. I mentioned it to hubby and he was interested. I told him I couldn’t imagine the taste and he said it should be fine.

Last Sunday, I had no other plans for dinner except for that much awaited adobong baboy and pusit which I simple call ADOBASIT. Sounds like a combination yet contradiction of the Ilocano terms “adu” (many or plenty) and “bassit” (small or not much). As I mentioned in my earlier posts about recipes, I really don’t have an exact recipe. As long as you know how to cook adobo, you’d know how to come up with this. What I did was to cook the adobong baboy first then when the pork meat was already tender, I added up the squid noting that when the later gets overcooked, the meat will harden. I gave the combination less than ten minutes to simmer and tada, dish was readied for dinner. The combination came in just fine. I’d say, the taste of the pusit dominated that of the baboy but was still ok. This is one dish that will get through my kitchen not just once or twice but often.

Don't you think they make a good pair?

You may have to think twice and give it a try!

Thanks to Noeds for sharing this authentic dish!


READ MORE...

Monday, November 26, 2007

What comes after deviating from the original recipe?

One of the advantages of keeping an e-group is that members get to exchanged ideas about any subject raised that interests anyone from the group. The subject could include family life, work, sentiments, rants, jokes, movies, men, women, travel experiences, kids and of course, recipes. The last subject gives me the highest interest especially if it is something that I can cook out from my kitchen. In one of my e-groups discussions, we talked about pasta recipes and some of the members mentioned about Fetuccini Alfredo. Since the dish name sounded complicated to me, I didn’t put much attention to it until after my last week’s search for an easy to prepare dish for dinner. With combinations of tiredness from my own dishes, riddance of take aways, excitement over a new recipe and short requirement for dish preparation, I googled what came out to be a delectable serving.

Google search took me to http://www.allrecipes.com/ where I looked for various recipes and ended up choosing from 2 pasta dishes. With quick preparation in mind, I opted for the “Broccoli Chicken Fettuccini Alfredo”. Original recipe is shown below but with limitations of supplies in the grocery store, I did my usual variation style which turned out to be "Broccoli Ham Spiral Alfredo" (My modifications are shown in italics).

INGREDIENTS
1/2 pound dry fettuccine pasta (500gms spiral pasta)
1 cup fresh chopped broccoli
2 tablespoons butter
1 skinless, boneless chicken breast (4 regular ham slices)
1 (10.75 ounce) can condensed cream of mushroom soup [2 regular cans cream of mushroom soup (Campbells)]
1/2 cup milk 375ml fresh milk
1/2 cup grated Parmesan cheese


DIRECTIONS
1. Bring a large pot of salted water (and cooking oil) to a boil. Add fettuccini (spiral) pasta and cook for 8 to 10 minutes or until al dente, adding broccoli for the last 4 minutes of cooking. Drain.

2. Cut chicken breast meat (ham slices) into bite size pieces, trimming any fat off in the process. In a large skillet melt butter or margarine over medium heat. Add chicken (ham) and saute until well browned. Add soup, milk and cheese and stir all together. Add pasta/broccoli mixture and heat through. (I didn’t heat through the mixture anymore, I just mixed the sauce in the separate pan) Serve hot.

The ham being sauted

Cream of mushroom added

Fresh milk added and started to boil


Sauce, pasta and broccoli all added and ready to eat

Preparation time: 5minutes, cooking time: 15 minutes and there the dish is actually ready in just 20 minutes.

Over the weekend, I got curious as to how the dish got its name. Instead of getting the information I wanted, I ended up reading more and more variations of this famous dish. Only today did I eventually have the chance to know this famous pasta’s origin and true to my hunch, it got its name from the cook who invented it. And guess what led the cook to this dish? To please his pregnat wife! What a romantic act.
Source: Wikipedia
Fettuccine alfredo is a pasta dish made from fettuccine pasta tossed with Parmesan cheese, butter, and heavy cream. As the cheese melts, it thickens the liquids to form a smooth and rich coating on the pasta.

When butter was added both before and after fettuccine was put in the serving bowl, the butter was known as doppio burro (double butter). Di Lelio's original contribution was to double the amount of butter in the bowl before the fettuccine would be poured in, thus a triplo burro (triple butter) effect instead of double. And why did Alfredo double the amount of butter? His young wife was pregnant and was unable to keep any food down. Alfredo tried every dish he could imagine, but his variation on the fettuccine worked. When his wife began eating again, Alfredo added the new dish to his restaurants menu, but it was not perceived as being anything special until a couple of Hollywood movie stars stumbled across it a decade later.

READ MORE...

Sunday, November 18, 2007

Basil and seafoods (updated)

I really love cooking and I’d say my median skills are results of observation, practice, experimentation and exploration. Recently, I discovered how the herb basil contributes to the aroma and savour of seafoods. Perfect is how my husband describes it.

I used to know and use only the dried basil leaves which are also part of the bottle of “Italian spices” I use mostly for pasta preparation. Then I figured that the taste I didn’t like much from fried chicken and squid tentacles sold in the night markets is actually fresh basil leaves added just few seconds before the goods are lifted up from the boiling oil for dripping. It is also the same herb usually added in the viands served in my workplace’s canteen.

One time, we had dinner in our friend’s place and she served us clams filled with herbs. From the smell of it, I told her that was the scent I avoid in foods but she told me it goes well with the clams. I really didn’t have to eat the leaves because the main purpose of having it added in the viand is just to make it smell even better - in other words, the basil leaves were the dish's seasoning. Setting aside the herbs, I spooned only the sauce and the clams and to my surprise, it tasted oh so good.

From there, I searched from the internet facts about basil leaves and realized that pesto is actually made from it, with the addition of pine nuts and olive oil. That made me even more excited leading me to looking for articles on how to make pesto. I found several writings about it which basically say the same thing but presented in different ways. Anyhow, I planned to make pesto by myself but didn’t have the food processor and realized our blender is too small to make a desirable amount. So until now, I still didn’t give it a try.

On the other hand, when I had the chance to prepare various seafood recipes after that “fishing” experience in Taoyuan, I bought a bag of fresh basil leaves and had them as one of the main ingredients in my cooking.


The first dish I cooked was a replica of the clams my friend prepared. The recipe is very simple – all I needed were chopped onions, pressed garlic cloves, small amount of oil, oyster sauce, clams and half-bag of the basil leaves. I sauted the first 2 ingredients, added the clams and oyster sauce and let it boil. Since the clams were soaked in water, there’s no need to add water. I covered the pan and let it boil for few minutes with the clam shells popping out here and there. When the sound lessened, I opened the pan and noting that most of the shells are opened, I added the basil leaves and covered the pan again and left it boiling for another few minutes. My allotted time is not really measured as I am used to estimations.


The second dish I cooked with basil leaves consisted of the crab legs as the main ingredient along with the same items listed earlier but this time, I also had an egg and flour in my preparation table. For ease of eating, I asked hubby to crash the shells with the “pounding” metal before cooking. That time, what I had in mind is the dish that we usually order in a seafood restaurant we visit on an occasional basis. It’s actually quite expensive so I thought of imitating it. I guess I was lucky to get it right on my first try. The crab legs were boiled separately first, a dash of salt to taste is added. After boiling, I set separated the crab legs from the broth and set aside the latter. I took another pan and sauted the onions and garlic on a small amount of oil (mine was olivenol oil) then added the crab meat. After several toss and turns, I added the oyster sauce and the broth and left it to boil while I beat the egg and mixed the flour with a small amount of water. I actually used flour because I didn’t have corn starch in my kitchen cabinet. The purpose of adding it anyway is to make the mixture a little sticky. Now when the boiling mixture matched my taste, I added the egg and mixed flour and stirred what’s on the pan. Then I added the basil leaves, covered the pan and let it simmer for few minutes. The scent of the herbs filled our small kitchen area and extended to the living room and bedroom which made us hungry right away. Good thing the rice is already cooked so after allowing the dish to simmer, it was time to get the serving bowl and lay the dish on the table. We set aside Jade’s porridge and decided to serve her plain rice with the crab meat either from mommy or daddy’s plate. Of course, compliments in forms of “wows” and “sarap” followed while we were feasting on this newly discovered viand recipe. I ate bare handed which made it even better for me to enjoy the meal.


I will still have to work on the pesto but the next thing I have know is where to find the pine nuts.


READ MORE...

Tuesday, September 11, 2007

Of cravings, pasta, passion and quick preparation...

Recently, I have regular cravings for a taste just like this. I guess mine is more of a penchant for the combination of olive oil, butter, herbs (or Italian spices) and parmesan cheese. My passion for cooking has made me come up with two variations from the chicken-shrimp pasta that was served first. The second one was added with salmon and instead of using butter when I sauteed the ingredients, cheese was used. My third variation was served last night. I went to town and decided earlier that my husband and I take care of our own dinner - he would buy on the nearby store in our apartment compound while I choose where to eat in town. The choices I had include McDonalds, Yoshinoya, Moss Burger and Kohikan - all of which are fastfood chains. I was not really hungry and thinking of the choices mentioned didn't boost my appetite anyway. Then came the urge for "that" taste. I thought my daughter could have finished her dinner already by the time I arrived home so she could have settled by then and not be catching my attention while I cook, and Dennis is there anyway. When I got into the bus bounded for home, I called him and asked him to cook the pasta so when I get there, I would only be cooking the rest of the ingredients.

I dropped by the grocery, passed by the vegetable section first and thought adding brocolli would be nice so I grabbed one, headed to the meat section and picked up a packaged boneless chicken. I also grabbed a bottle of orange juice on my way to the counter. That's all I got from the grocery. I checked on Jade for few minutes and without even changing clothes, I started to quickly prepare the stuffs I needed - diced onions, (I left out the garlic this time but I used the powdered one instead), diced chicken, sliced brocolli and... tadah... I started the cooking. In a span of 30 minutes, the dish is ready to be eaten. I forgot to mention that the pasta was timely cooked when I got home so all I did was to drain it and coat it with the butter that I intentionally mixed in the saute for quicker preparation. I guess it was the quickest pasta preparation I ever did. The result was great. Adding the brocolli made it even better. I had a second serving at 10PM as I needed to put our daughter to sleep right after I ate my first platter. Moreover, we had a packed pasta for breakfast at work.


The following are photos from my second variation - chicken, shrimp and salmon.


the buttered pasta


the concoction


the mixed concoction and pasta


the dish - served and ready to eat


READ MORE...

Thursday, August 30, 2007

ala jollibee spaghetti

This is post is especially for Sharon, one of my avid blog fans, lol!

She asked me to share the ala-jollibee spag recipe that I learned from my Pinay friends here in Taiwan. To make it easier for me, I tried to search the recipe in the web (which I usually do, I even checked from the Jollibee websited if they have it published but of course, they’ll not do that otherwise, their spag will not be “unique” anymore) but didn’t really find one. I grabbed a near resemblance and did 50% editing. Lol!

Sha, I’ll be happy to hear from you later that this recipe has satisfied your craving, if I may say so, for JB-spag.

PS. Agluto ka ah. Pinagrigatak daytoy, hahaha.

Ingredients

  • 1 kg. spaghetti noodles
  • 1 kg. ground beef or pork ( 1/2 kg could be enough though)
  • 1/4 kg. hotdogs, diagonally sliced (hotdogs here are different from the Filipino versions and I don’t think they will go with the sauce so I skip this ingredient)
  • 1 kg. tomato sauce ( if you can find banana ketchup, the better)
  • Evaporated Filled Milk 370 mL or the biggest can size
  • Sweetened Condensed Filled Milk 168mL or the smallest can size (I think they come in three sizes, 370mL is the L, 250mL is the M and 168mL is the S)
  • 2 green bell peppers, diced (I also skip this ingredient. Diced carrots could be added as well)
  • 2 onions, chopped
  • 1 head garlic, minced (the more the better, I love the scent it generates when it is being sauteed)
  • 3 tablespoons of cooking oil (again, I recommend Olive oil. Maybe adding butter will help, I never really tried it, hhmmnnn, I can try next time)
  • Salt and pepper to taste
  • 1/2 cup grated cheese (or more, depends on your preference. Cheddar cheese is recommended for a creamier taste.)

Instructions

  • Cook spaghetti noodles according to package instructions. There you go; it is not stated “cook noodles as usual anymore” hahaha.
  • While cooking the noodles, boil the ground meat in a separate pan. Simmer for at least 10mins. Drain afterwards. You can separate the “soup” if you desire and have it used in another recipe later. (It can be stored in the freezer for future use huh!).
    • PS. Others don’t boil the meat separately, its your choice.
  • In a separate, sauté garlic and onions in cooking oil.
  • Add ground meat and cook until the meat turns light brown. Since it has been boiled earlier; that is, if applicable, it can quickly turn into light brown.
  • Add bell pepper and/or carrots.
  • Add tomato sauce, condensed milk, evap milk, salt, pepper to taste then let simmer for 10 minutes. (Tantiya-tantiya kadi will do. Balance the sweet-sour taste. I think we look for that sweet taste, right?).
  • Add hotdogs (if applicable).
  • Add the cheese (Yup, it makes a difference when you add the cheese while cooking the sauce. Make sure you check how salty the cheese is so you would know how much salt you’d add otherwise, it may turn out so salty. If that happens, you can neutralize it by adding sugar or milk if you have extra on hand)
  • Mix sauce and noodles. (They can be served separately of course). Top with grated cheese.

Yummy! You can have toasted garlic bread along with it. HHmmmnn, I’m suddenly hungry.

READ MORE...

Sunday, June 25, 2006

Saturday is Paella Day

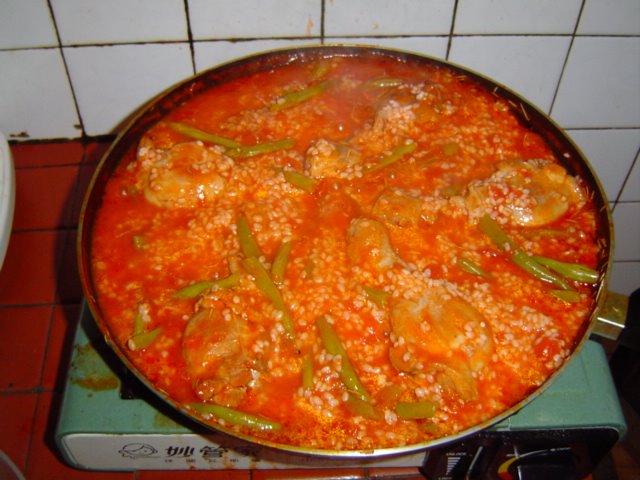
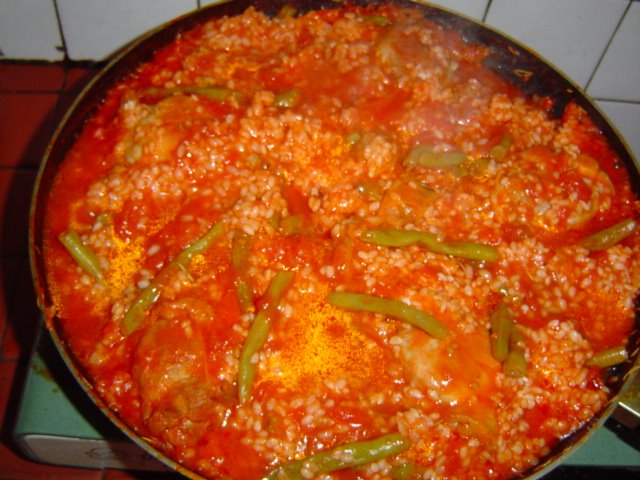
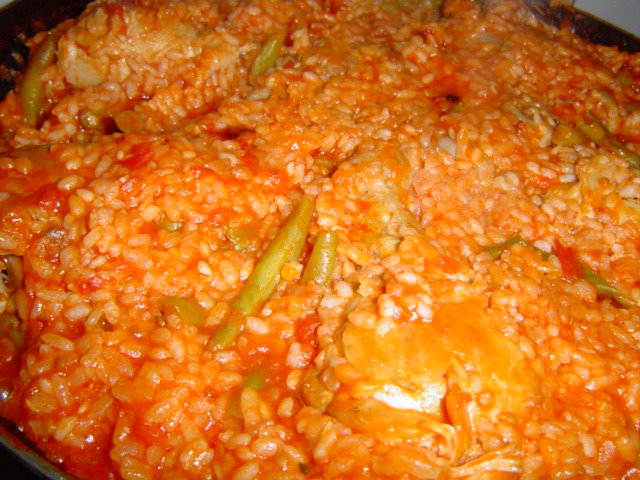
Alas, after more than two years, I was able to cook chicken paella again……

Few weeks ago, Dennis and I jumped into a CNN featured clip of Spain’s famous dish – paella. The one featured is chicken paella cooked in a very large pan which served around 50 people. Yes, that much – in a single cooking.

It reminded me of the paella recipe our Spanish friend Rebeca has taught us back in Limerick, Ireland during the ADI days. Dennis asked if I can cook for him, I said of course, but then I didn’t have time to do it until yesterday.

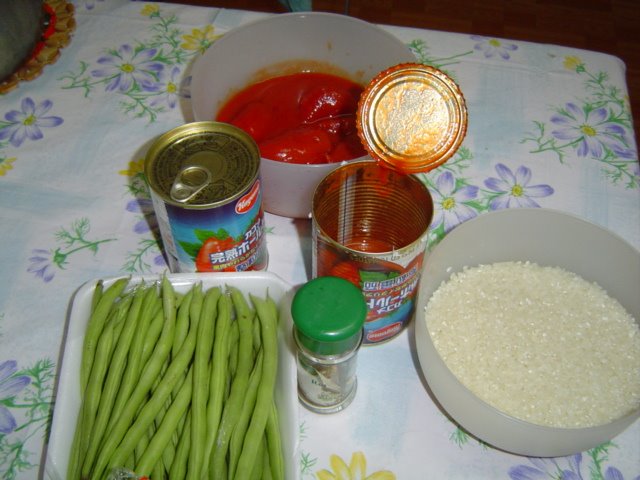
I had to recall the ingredients first. I browsed in the net but the recipes there are not as simple as I thought. “Where would I buy those stuffs needed” was the first thing in mind. Rebeca’s recipe was so simple. I only needed 4-5 ingredients such as rice, canned whole tomatoe, chicken and beans. Hey, these could be easily found in the grocery, at least I could see them immediately. Saffron of course is needed but I am not sure if I could find one, I thought of a food coloring as a subsitute (we did that back in LK because saffron is expensive, mind you).

Yesterday was quite a good day to cook the dish since hubs stayed at home (after several weeks of spending OT in the office), he could take care of Jade while I’ll be cooking the paella for our dinner. So off we went to the grocery and I picked up the stuffs I needed. I couldn’t find any food coloring but I thought it wouldn’t matter anyway. Rosemary leaves are also needed but I already got them at home.

Having all the ingredients needed, I started to prepare the dish with excitement. Here are what I had…

5pcs of chicken legs
250gms of beans
2 canned whole tomatoes
3 cups of rice
Rosemary leaves
Salt


…and here are the steps I did to come up to the much awaited paella –

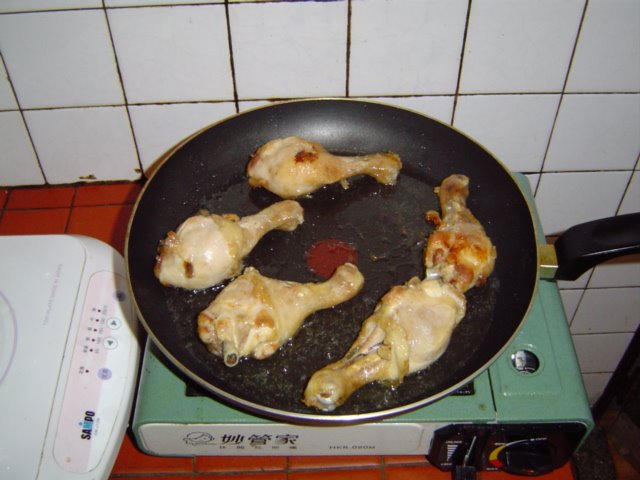
1. Fry the chicken, brown both sides. (not deep fry)

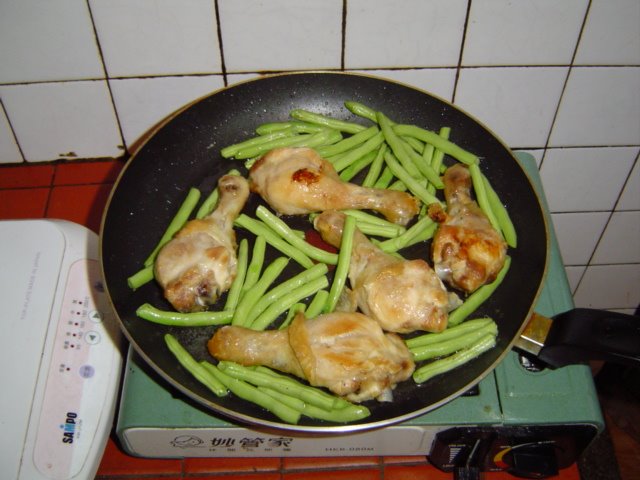
2. Remove most of the cooking oil after the chicken has turned into brown. (and transfer the chicken to the bigger pan, of course a single pan can be used)


3. Add the beans.

4. Prepare the whole tomatoes, squeezed them in a container and added some water. I was able to buy peeled tomatoes so there was no need for me to skin them.


5. Add the tomatoes in the pan.


6. Add salt to taste


7. Sprinkle rosemary leaves.

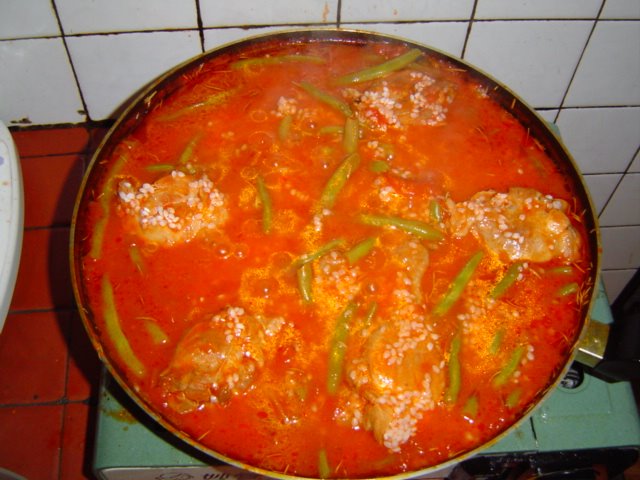
8. Simmer for 20-30 minutes. This will make the chicken and beans absorb the savor of the tomatoes.

9. Add the rice.

(Tip: Remove some of the sauce and place it in a container. When the rice starts to get cooked, the sauce will be absorbed so if you see the sauce getting dried but with the rice still uncooked, you can pour back the sauce you removed earlier so you can get the rice cooked well).***

10. Let it cook for 20-30mins


11. Serve well and enjoy the dish.

***While the rice is getting cooked, I bathed our daughter while hubby was starting to complain that the smell of the dish made him hungry.

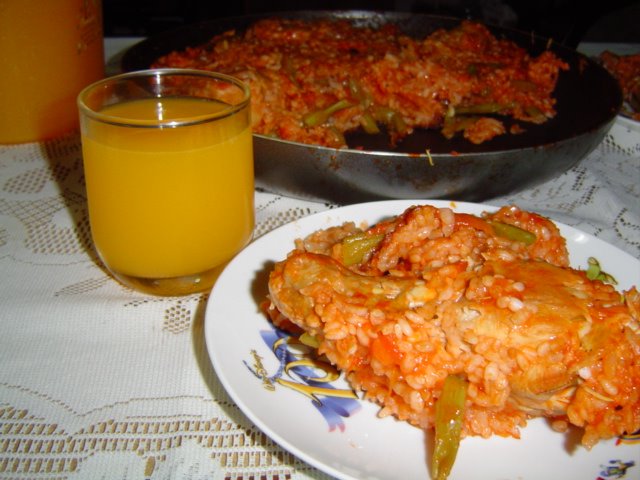
Hhhmmmnn, you can serve it with wine if you are into it. It’s a no-no for me at this time so we had orange juice instead.

I remember a friend told me that lemon can also be sprinkled in the paella before serving.

And here is my “Paella ala Jane” which satisfied Dennis who suggested that I cook paella weekly huh!


READ MORE...